“But I don’t want to learn formulas! I want to learn to draw.”
Drawing with a marker requires you to make a lot of very fast decisions. If you’re new to this, you can be overwhelmed and disheartened very quickly. This stuff is hard to learn.
Learning formulas to quickly draw features will remove one task from your crowded brain. You’ll be more able to focus on placement, line weight, shapes, planes, and carrying on a conversation.
Once learned, these formulas can be adapted to any face, changed, or forgotten. The important thing is that they make your task more endurable now.
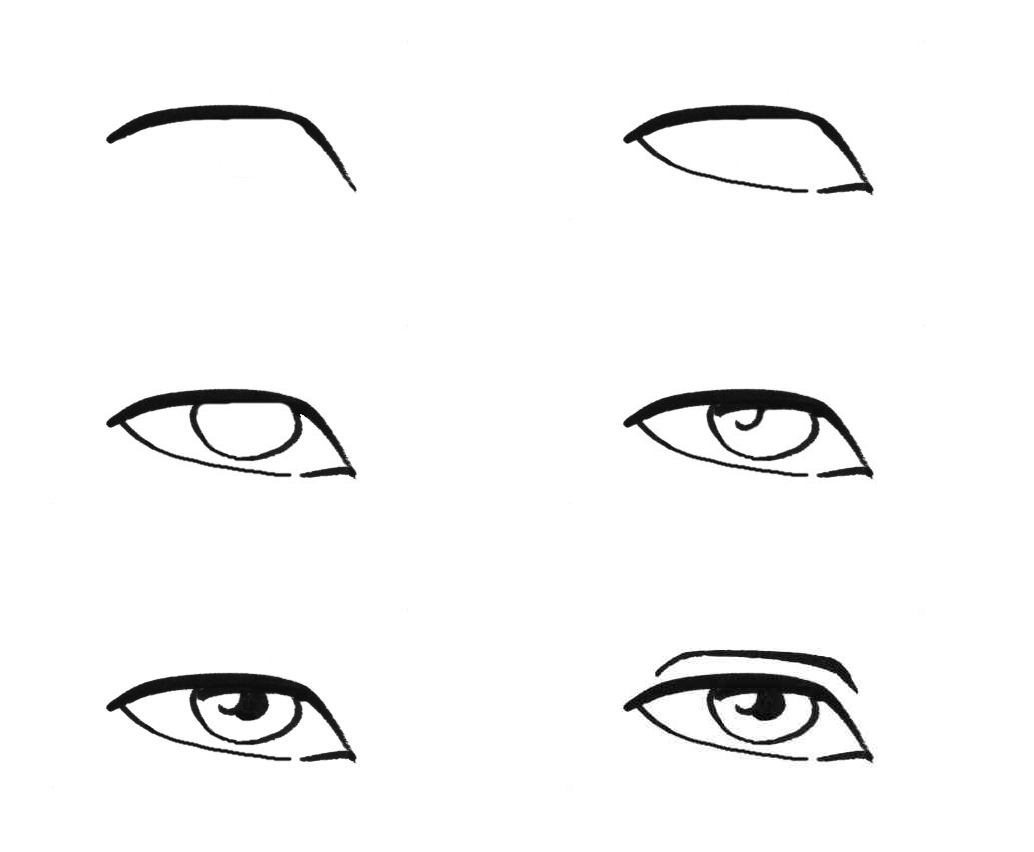
The Eye:
1. Draw a thick line on top.
2. Draw a thin line on bottom.
3. The iris is a perfect circle… but don’t draw the whole circle.
4. Draw a shadow on the iris, cast by the eyelashes.
5. Put a highlight in the eye. Off-center, not too big.
6. Put the pupil right in the middle of the iris.
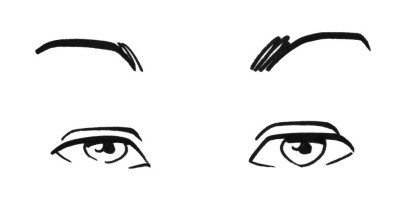
7. Add an eyelid.
Do this until you do it without thinking. Most of my new people forget to draw the shadow (step 4) after awhile. Don’t forget the shadow. It adds a lot of subtlety and depth.
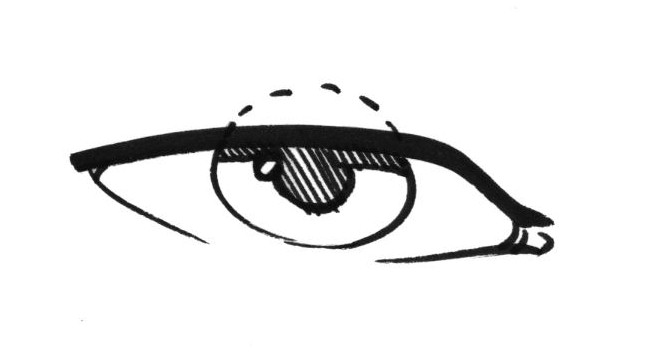
How the eyelid sits over the iris. Usually, the eye opens just wide enough for the pupil to be exposed, no further.
Don’t forget to position the highlight below the shadow.
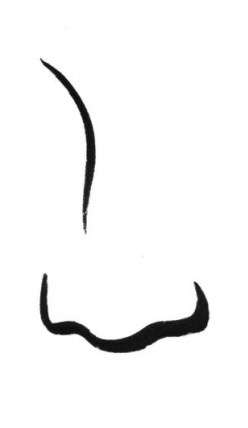
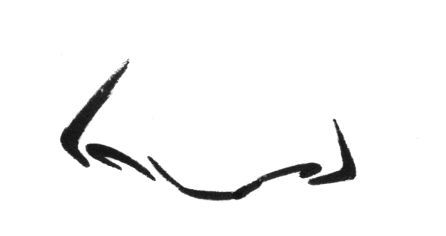
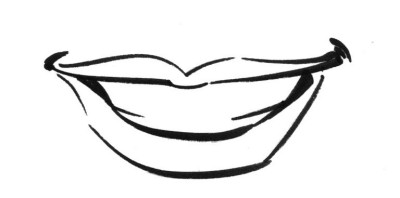
Formulas! The nose and mouth.
Simple: There’s nothing to the nose… just put it in the right place and watch your line weight. Get that first nose down and move on to the second… learn how to draw accurate foreshortened nostrils.
On the mouth, pay close attention to where the lines are heaviest. This is probably the most important area to control your marker well. Every little change in weight will make a different shape or expression.
Next post: A lot of what not to do
This post written by Tielman Cheaney

I am having a hard time getting fine lines with a marker. How can I improve this?
Hi Lova,
Use a brand new marker. As they age, they develop a mushier tip. Then plant the heel of your hand on the paper. Let that be where most of the weight and pressure from your arm falls. Then, barely touch the marker to the page, lock your hand, and make a bunch of lines really fast. Draw from your elbow, don’t move your wrist, and let the heel of your hand absorb all the the pressure.
Thanks for the suggestions!
What a difference it made when I locked my wrist and drew from the elbow! I practiced this technique and was able to accomplish the desired line weight. Also freed me up from drawing with force😊 Much better strokes!